Taking a Vehicle
To start using a vehicle, you must perform the handover procedure. This is done via the Vehicle Handover and Return wizard on the main dashboard.
Step 1: Vehicle Selection
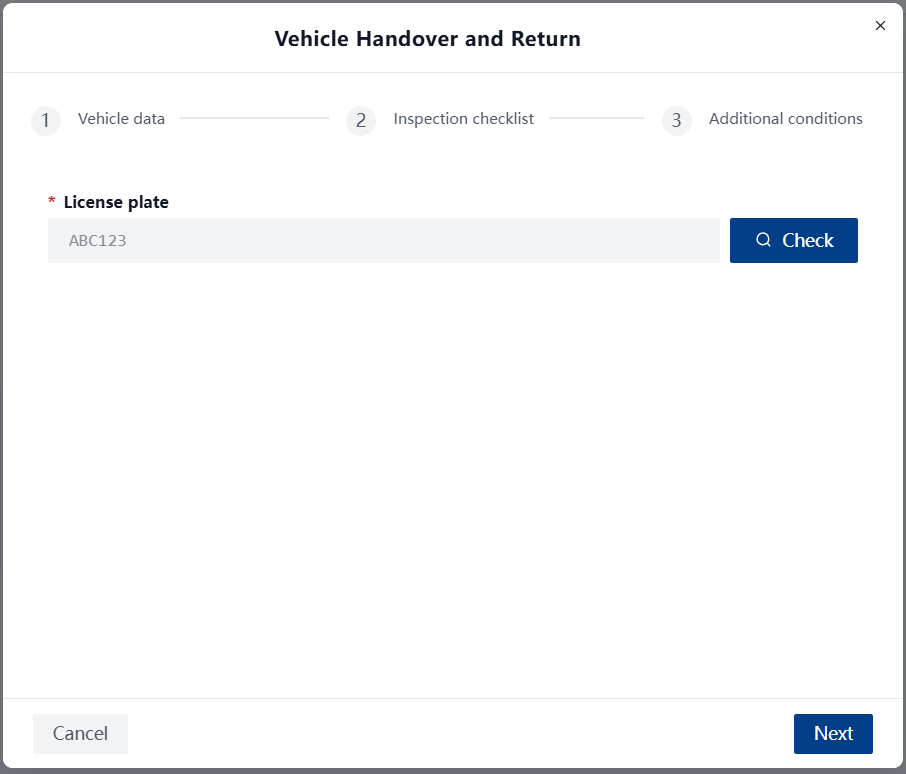
- Enter License Plate:
- Start typing the number in the License plate field.
- The system automatically suggests options when you enter at least 2 characters.
- Suggestions show the vehicle brand, model, and status (Active/Inactive).
- Check:
- After selecting a vehicle, click Check.
- The system checks if the vehicle is available and if there are no reservations for other persons.
- If the vehicle is free, you will see its technical info (Brand, Model, Year, Type).
Step 2: Inspection Checklist
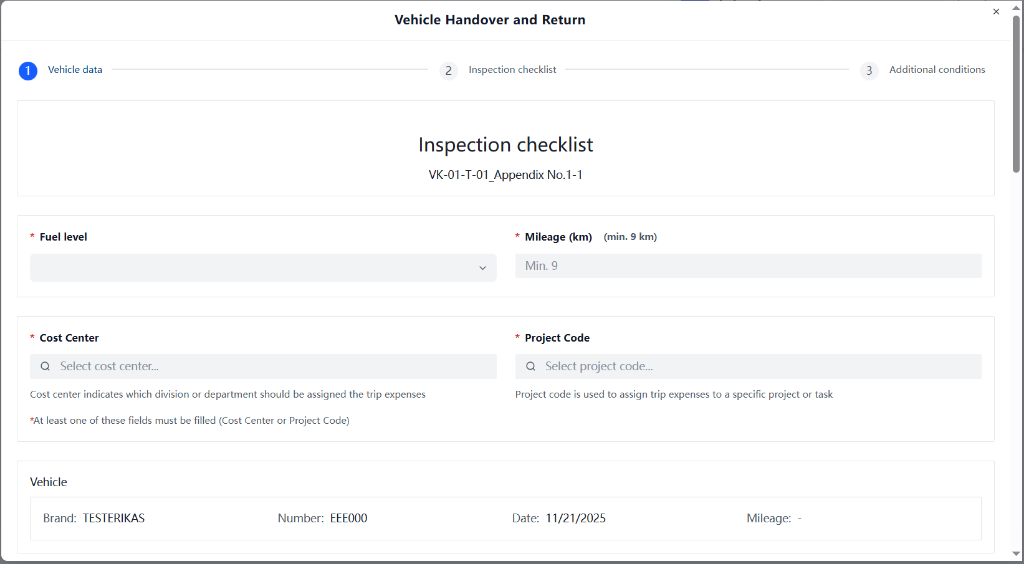
In this step, the initial condition of the vehicle and trip data are recorded.
Required Data
- Fuel level: Select from the list (Full, 3/4, 1/2, 1/4, Empty).
- Mileage: Enter the current mileage.
- Important: Mileage cannot be lower than the last return mileage. The system checks this automatically.
- Cost Allocation: You must fill in at least one of these fields:
- Cost Center: Select from the list.
- Project Code: Select from the list.
- Receiving Employee: Your name is entered automatically.
Technical Condition
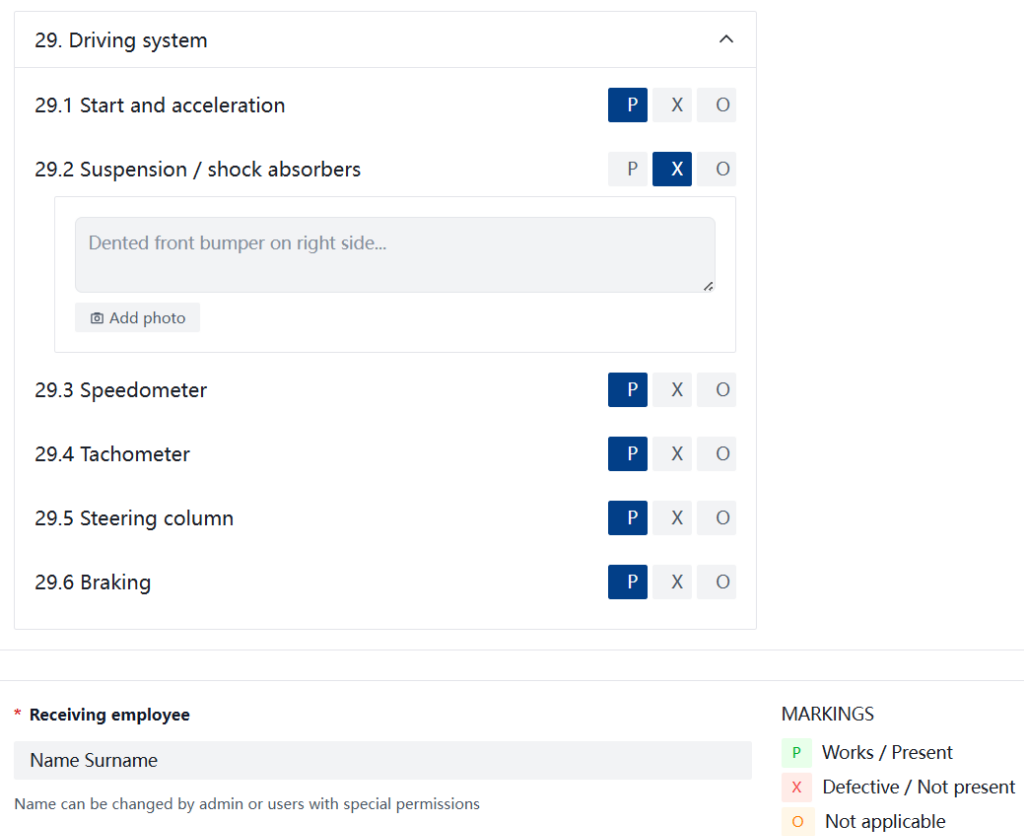
Review the list of technical components (e.g., "29. Driving system"). Each item has three states:
- P (Works/Present) – Works / Present.
- X (Defective/Not present) – Defective / Not present.
- O (Not applicable) – Not applicable.
Recording Defects
If you mark X, the system may ask you to upload a photo or write a comment. This is important so that the defect is not attributed to you upon return.
Step 3: Confirming Conditions
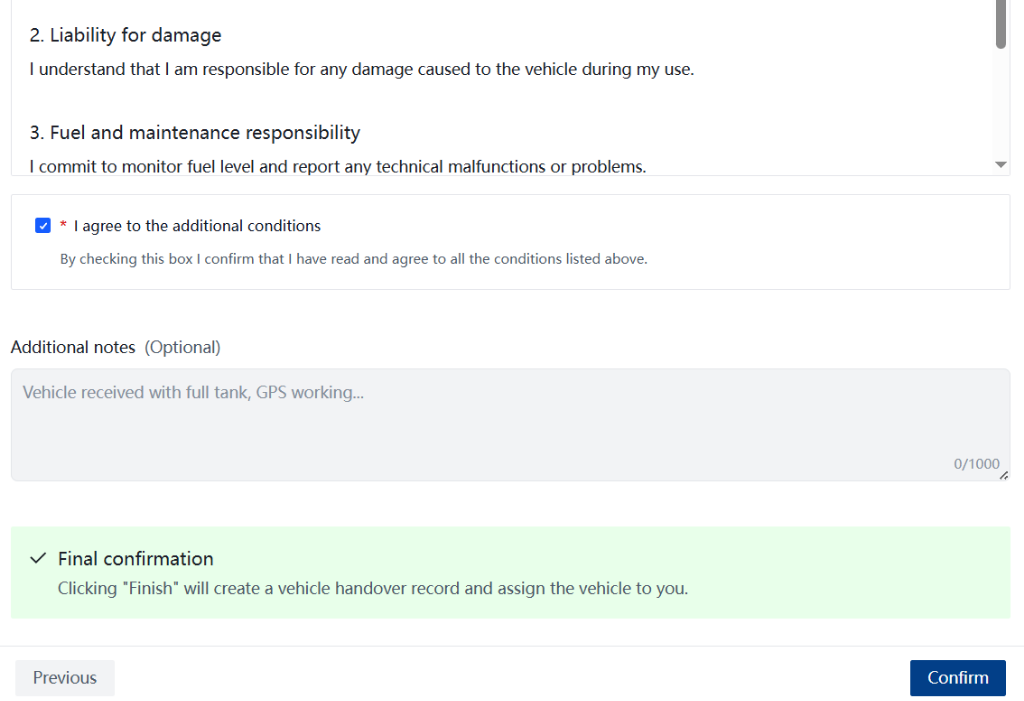
The final step presents a summary and terms of use.
- Summary: Check if the vehicle, fuel level, and mileage are correct.
- Conditions: Read the 5-point liability conditions.
- Confirmation:
- You must check the box I agree to the additional conditions.
- If you have comments (e.g., "Vehicle is dirty"), enter them in Additional notes.
- Click Confirm.
success
✅ Information complete and verified.